

Like restoring a finely tuned instrument, you can bring original timber sash windows back to life by inspecting decay, removing sashes, stripping failed putty, and repairing damaged timber before you touch the glass. You’ll also need to replace worn cords, prepare clean rebates, and re-glaze with fresh putty so the frame seals properly. Finish with primer and paint, and you’ll preserve the window’s character—if the hidden damage doesn’t force a different fix.
Key Takeaways
- Inspect sash windows for timber decay, broken cords, corrosion, and sticking movement before removing any parts.
- Strip failed paint, putty, and rotten timber carefully to expose sound wood and preserve original profiles.
- Repair damaged sections with scarfed inserts or resin, then plane repairs flush for accurate reassembly.
- Replace cords and glazing, seating glass in a continuous putty bed with neat weatherproofed edges.
- Prime, paint, and maintain all joints, beads, and moving parts to protect the window and ensure smooth operation.
Inspect Timber Sash Window Damage
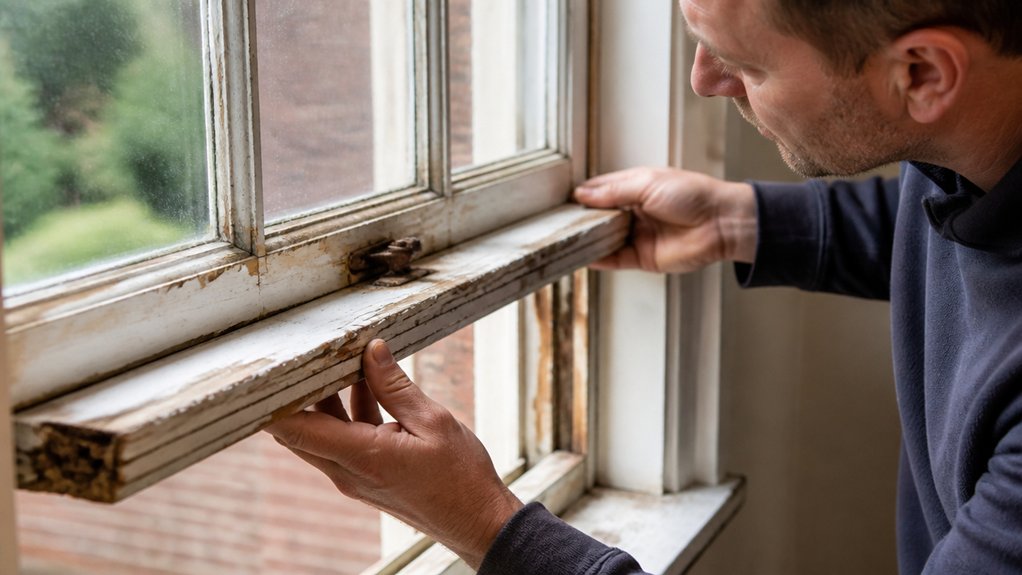
Before you start any repair, inspect the timber sash window carefully for the full extent of the damage. You’ll spot timber decay by probing soft areas at joints, bottom rails, and sill edges with a blunt tool.
Check for flaking paint, open joints, and distorted profiles, then note where moisture has entered.
Look closely at hardware corrosion on pulleys, locks, fasteners, and cords; rust often signals hidden wear and reduced function.
Test the sash movement gently to identify sticking points, but don’t force anything.
Record every defect so you can plan repairs in the right order and preserve as much original fabric as possible.
When you assess methodically, you protect the window’s character and join a careful tradition of skilled upkeep.
Remove the Sash Windows Safely
Clear the area around the window, lay down protection, and keep your tools within reach before you start.
You’ll need to remove any stops, cords, or weights that still hold the sashes in place.
Lift each sash out carefully with both hands so you don’t crack the timber or damage the frame.
Prepare the Work Area
Start by removing the sash windows carefully so you can work on them safely and keep the surrounding joinery intact.
Lay down dust sheets, clear nearby furniture, and set out your cleaning tools so everything’s within reach.
Wear proper safety gear, including gloves and eye protection, because old paint, dust, and sharp edges can catch you out.
Label each part as you remove it, and keep fixings in separate containers so nothing goes missing.
Protect the floor and adjacent timber with masking tape where needed.
Good preparation helps you stay organised, reduces damage, and makes the repair job feel like part of a well-run team effort.
When the area’s tidy and controlled, you can focus on accurate restoration and finish the work to a high standard.
Lift Out Sashes Safely
With the work area prepared, you can lift the sashes out one at a time without stressing the cords, pulleys, or surrounding timber.
Start with the lower sash: remove the staff beads, ease the stop, and support the weight as you free the cords. Tie each cord off to keep it from slipping back into the frame.
Then raise the upper sash, detach its beads, and repeat the process.
Keep the parts in order so you preserve historical accuracy and make reassembly simpler.
Use a steady grip, and don’t twist the rails or stile joints.
Place each sash on padded trestles.
Choose your handling method with careful material selection in mind, especially if the timber is soft, cracked, or painted.
Strip Rotten Timber and Old Putty
Before you remove any new material, you need to strip out all rotten timber and old putty so you can expose sound wood and assess the true extent of the damage. Work with a sharp chisel, a putty knife, and controlled heat if needed, but keep pressure light so you don’t scar the surrounding glazing bars.
Remove loose paint, brittle bedding, and every decayed section until you reach firm, clean timber. This gives you a reliable base for woodgrain restoration and supports proper historic preservation.
As you clear the opening, brush away dust and check for hidden softness at the edges. You’re aiming for a clean, stable perimeter that lets you see exactly what you’re working with. That’s how you protect the sash’s character and prepare for accurate repair.
Repair Timber Sash Window Frames
Once the rotten material is out, you can repair the sash frame by rebuilding only the damaged sections and leaving sound timber intact. You’ll keep the original profile, match grain direction, and use a compatible repair resin or scarfed timber insert where the loss is deepest.
Cut clean shoulders, dry-fit each piece, then glue and clamp firmly so the frame stays square. Scrape away squeeze-out before it cures.
Once set, plane the repair flush and check that arrises, mouldings, and meeting rails line through neatly. This careful method preserves Historical authenticity while still giving you a durable result.
Finish with primer and Decorative finishes that suit the rest of the window, so your repair blends in and your sash looks like it still belongs.
Replace Sash Cords and Hardware
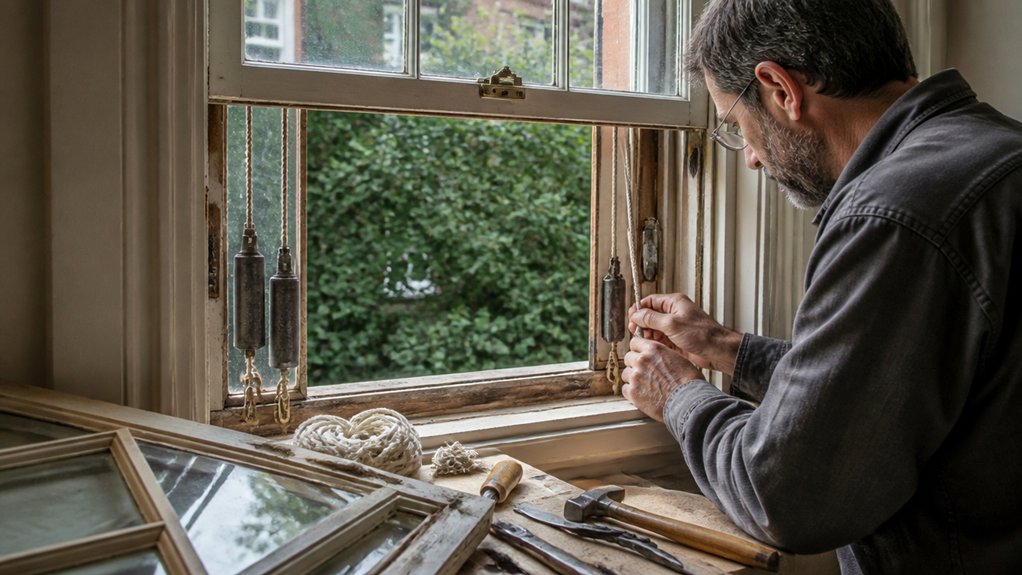
If the cords are frayed, stretched, or broken, replace them before you refit the sashes. Use the old cord as a guide, then cut new lengths and tie them securely to the weights. Keep tension even on both sides so the sash runs smoothly and sits level.
During sash cord replacement, inspect pulleys, screws, and locks for wear or corrosion. Clean each part, then decide whether simple servicing will do or whether hardware upgrading makes better sense for long-term reliability.
Fit new brass or stainless fittings where the originals have failed, and match sizes carefully so the frame closes properly. You’re restoring a working window, not just parts, so every sound component helps the whole sash feel dependable, familiar, and part of your home.
Prepare Timber Sash Windows for Glazing
With the sash cords and hardware sorted, you can prepare the timber for glazing by removing every trace of old putty, loose glass, dust, and paint from the rebate. Work carefully with a sharp knife, chisel, and stiff brush so you don’t bruise sound timber.
Check the rebate for decay, splits, or previous repairs, then consolidate weak areas before you move on. A clean, true seat helps you protect the sash’s profile and keeps historical restoration standards intact.
Choose material selection with care: matching the original timber and compatible primers supports longevity and authenticity.
Finish by dusting the frame, wiping it dry, and confirming the glazing groove is square, sound, and ready for the next stage.
Glaze Timber Sash Windows
Choose a high-quality glazing putty that suits timber sash windows and holds its shape well.
If any glass panels are cracked or broken, replace them with accurately cut panes before you bed them in securely.
Finish by sealing the glazing neatly so you improve weatherproofing and reduce drafts.
Choosing Appropriate Glazing Putty
When you re-glaze timber sash windows, the putty you use has to suit both the glass and the timber, because the wrong product can crack, shrink, or fail to bond properly.
Choose a traditional linseed oil putty if you want Historical accuracy and reliable performance in older joinery. It stays workable, lets you shape a clean arris, and supports a breathable repair.
Check Material compatibility with the timber finish, primer, and paint system before you apply it.
If you’re restoring a period home, you’ll fit in with the craft by matching the original method. Avoid modern sealants that look out of place or stress the frame.
Press the putty firmly into the rebate, strike it neat, and allow enough curing time before painting for a durable, authentic finish.
Replacing Broken Glass Panels
Once you’ve selected the right putty, you can replace the broken glass and re-glaze the sash with confidence. First, remove loose shards, then clear old glazing points and lift out the damaged pane without stressing the timber.
Measure the opening exactly, and cut your replacement glass to fit with a small clearance. If you’re matching decorative glass, note the pattern before ordering so the sash keeps its character.
For stained panels, handle each section separately and label them for correct placement. Set the new pane into the rebate, secure it with fresh glazing points, and check that it sits square.
You’re preserving the window’s original craft while keeping your repair tidy, durable, and true to the sash’s design.
Sealing For Weatherproofing
With the new pane secured, you can glaze the sash to seal out draughts and moisture. First, press a continuous bed of glazing putty or compatible sealant into the rebate, then smooth it cleanly to shed water.
Use weatherproofing techniques like back-puttying and neat arrises so rain can’t sit against the glass. Check the timber for soundness before you finish; if the wood’s soft, repair it first or the seal won’t hold.
Fit the staff bead tightly, and keep moving parts free enough to slide without binding. Choose sealing materials that suit original timber, not modern products that trap moisture.
When you work carefully, you protect the frame, improve comfort, and stay in step with others preserving these windows properly.
Seal, Prime, and Paint the Sashes
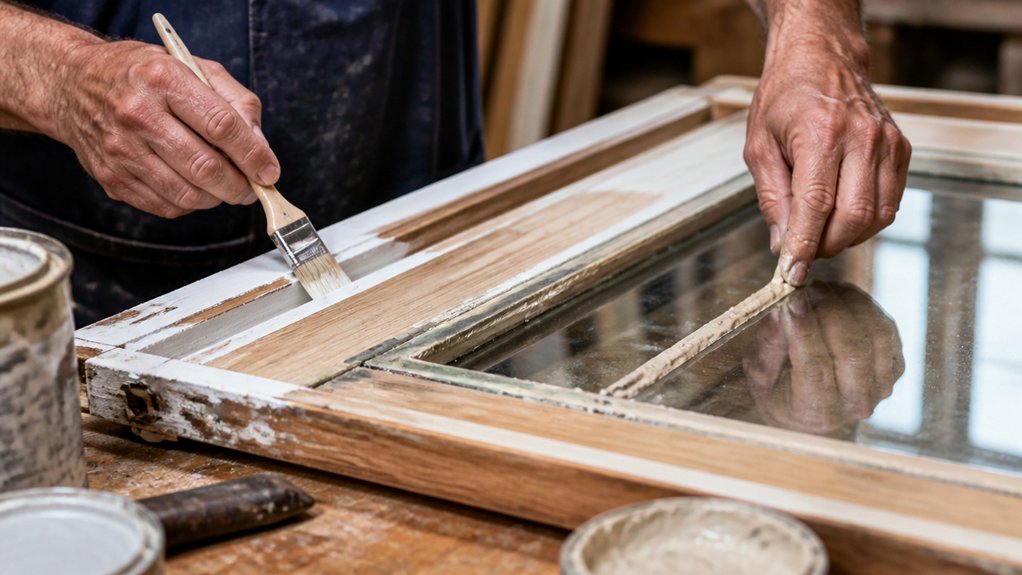
Before you paint, seal every exposed joint, end grain, and repaired area with a suitable exterior wood sealer or primer so the sash won’t keep drawing in moisture. You’ll create a stable base that helps the finish bond properly and protects the timber you’ve restored.
Brush on a thin, even coat, then apply primer to all bare sections, including glazing bars and putty lines. After it dries, lightly sand rough fibres and remove dust.
Choose quality exterior paint that suits your home’s Decorative finishes while respecting Historical accuracy, so your windows look right in the building’s setting. Apply two thin topcoats rather than one heavy layer, working with clean edges and full coverage.
Join other careful restorers who value durable, well-finished sash windows.
Maintain Sash Windows for Smooth Operation
After the paint cures, keep the sashes working freely by checking the cords, weights, pulleys, and parting beads for wear, looseness, or buildup. You should clean dust from the tracks and ease any sticky points with a dry lubricant, not oil.
Test each sash regularly, lifting and lowering it in one smooth motion. If a cord frays or a weight jams, replace it before it fails.
Tighten loose staff beads, but don’t force painted joints. Inspect the meeting rails for rubbing and shave only what’s necessary.
This routine protects Decorative finishes and supports historical restoration by preserving original timber and balance. When you stay ahead of minor faults, you keep your windows in your home’s tradition, working well and looking right for years.
About the Author


